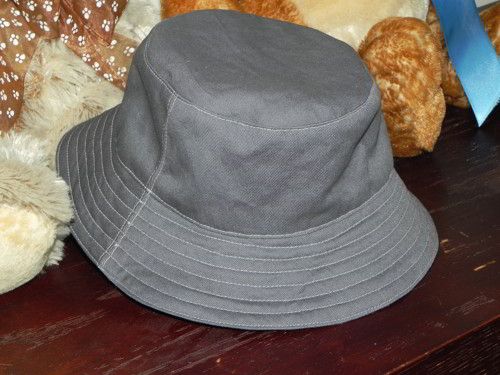
After sewing 6 Oliver + S Bucket Hats, I kind of feel like a bucket hat expert! The hats are not perfect, but I challenge you to go and find a RTW hat that is. :)
First of all, I tried several methods to construct the hat, and I think that Jessica from A Little Gray has the easiest method by far. Go and see her tutorial for the full run-down. Basically you complete the main fabric hat and the lining hat separately, sew them right sides together around the brims, leaving a gap for turning right side out.
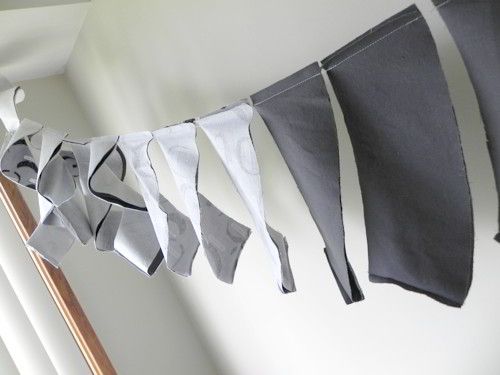
Since I was sewing so many bucket hats, I had some fun chaining. If you have never chained before, you should try it out!It was the most fun part of this project and makes me smile just looking at this picture! :)
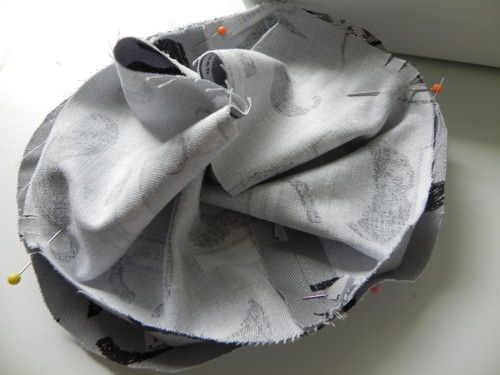
The most annoying step for me was sewing the side panels to the crown (I have heard others say this too). Below, you can see I have pinned the side panels on top of the crown piece. It is much easier to sew with the crown on the bottom. I started at one side seam, aligning notches and seam allowance carefully.
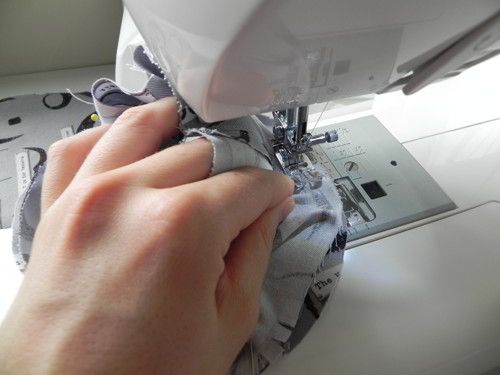
Here I am placing my hands so that I can manipulate the side panels to match the crown. Do not pull the fabric of the side panel towards you! Only pull the fabric carefully to the the left to realign the seam allowances. Pulling the fabric of the side panel towards you will stretch it, and you will find excess fabric when you get to the end of the seam. Avoid this simply by gently tugging it to the side and not by pulling towards you.
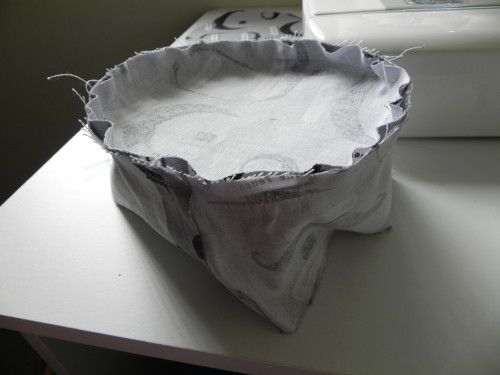
Below you can see clearly why this is probably the most annoying step of the whole bucket hat. The outer edge of the crown piece is longer than the side piece, that is why it buckles in like this. But trust me, the seam lines are exact. I sewed with only 4 pins and saw every notch line up perfectly, as long as I didn't stretch the side piece!
I found that once I got past this annoying seam, the rest of the steps seamed a lot simpler! I top stitched each seam right after it was finished. So the next step here was to top stitch.
Is there any other steps of bucket hats that you find annoying? Leave me a comment :)

Love the chain photo!!! :D Enjoyed reading this. :) Not a huge hat person, but have thought about sewing a ball cap. May have to sew up a bucket hat, though! :)
ReplyDeleteGreat tips, thank you! I never thought to sew both hats completely, then sew together and flip. I wonder why it wasn't written this way?? The hand-sewing, while meditative and zen-like, is so time consuming. I will keep all this in mind for my next bucket hat.
ReplyDeleteI'm not sure why it was written like that, maybe there is some sort of quality difference? I don't know but I am very happy with the way these turned out.
DeleteGreat to have these tips, thank you! I've made the larger size from the original pattern and am delighted to have found A Little Gray's rejig. If you have made the larger size, what height is your band (from where it joins to the brim to the crown piece) please? I feel like mine is too shallow, so it'd be nice to know if it is or not, from an expert in this field!! Also, do you have any top tips on zooming it up to larger, adult sizes please? My brain can't do that kind of working out... too many children, not enough maths classes! Thanks.
ReplyDeleteI just downloaded this pattern last week with intentions of making it for my boys. I am so glad I stumbled upon this post before I tried to tackle the project. Thank you for sharing!
ReplyDeleteDownloaded this pattern, thinking of making 3 hats, so only 50% as crazy as you. Hope mine come out as well. Thanks for the tip about how not to stretch and construction. I wonder if stay stitching would help with not stretching too.
ReplyDeleteI am confused on one thing though, is the seam allowance part of the pattern pieces or do I need to cut extra for that? I normally sew tote bags etc without a pattern, so I know what I'm aiming for as I made it up and if comes out an inch bigger or smaller than planned it doesn't really matter.
I eventually worked out the obvious that the seam allowance was included in the pattern and went on to make LOADS of hats.
Deletehttp://prolificprojectstarter.wordpress.com/2013/10/21/sunhats-galore/
thanks for the inspiration and tips
It's easier to sew the brim and band together, sew the side, then sew band to crown. There seems to be less pulling and tugging with ease.
ReplyDeleteI'd like to have a size chart. Just sewed RBH in size L, supposed to fit a 22" head circumference. It turned out to be a very tight fit, not room for hair.
ReplyDelete